 From black and cherry stain...
Here is the before picture of my kitchen table and bench started out with black legs
and a darker cherry table top.

.JPG)
 sanded the legs...
 sanded it all down

Spray painted legs with a white primer.
Painted brown paint over the white primer.
Then spray painted two coats of blue, then sanded when dry.

 Then I painted on a walnut stain/sealer to the legs and sides.
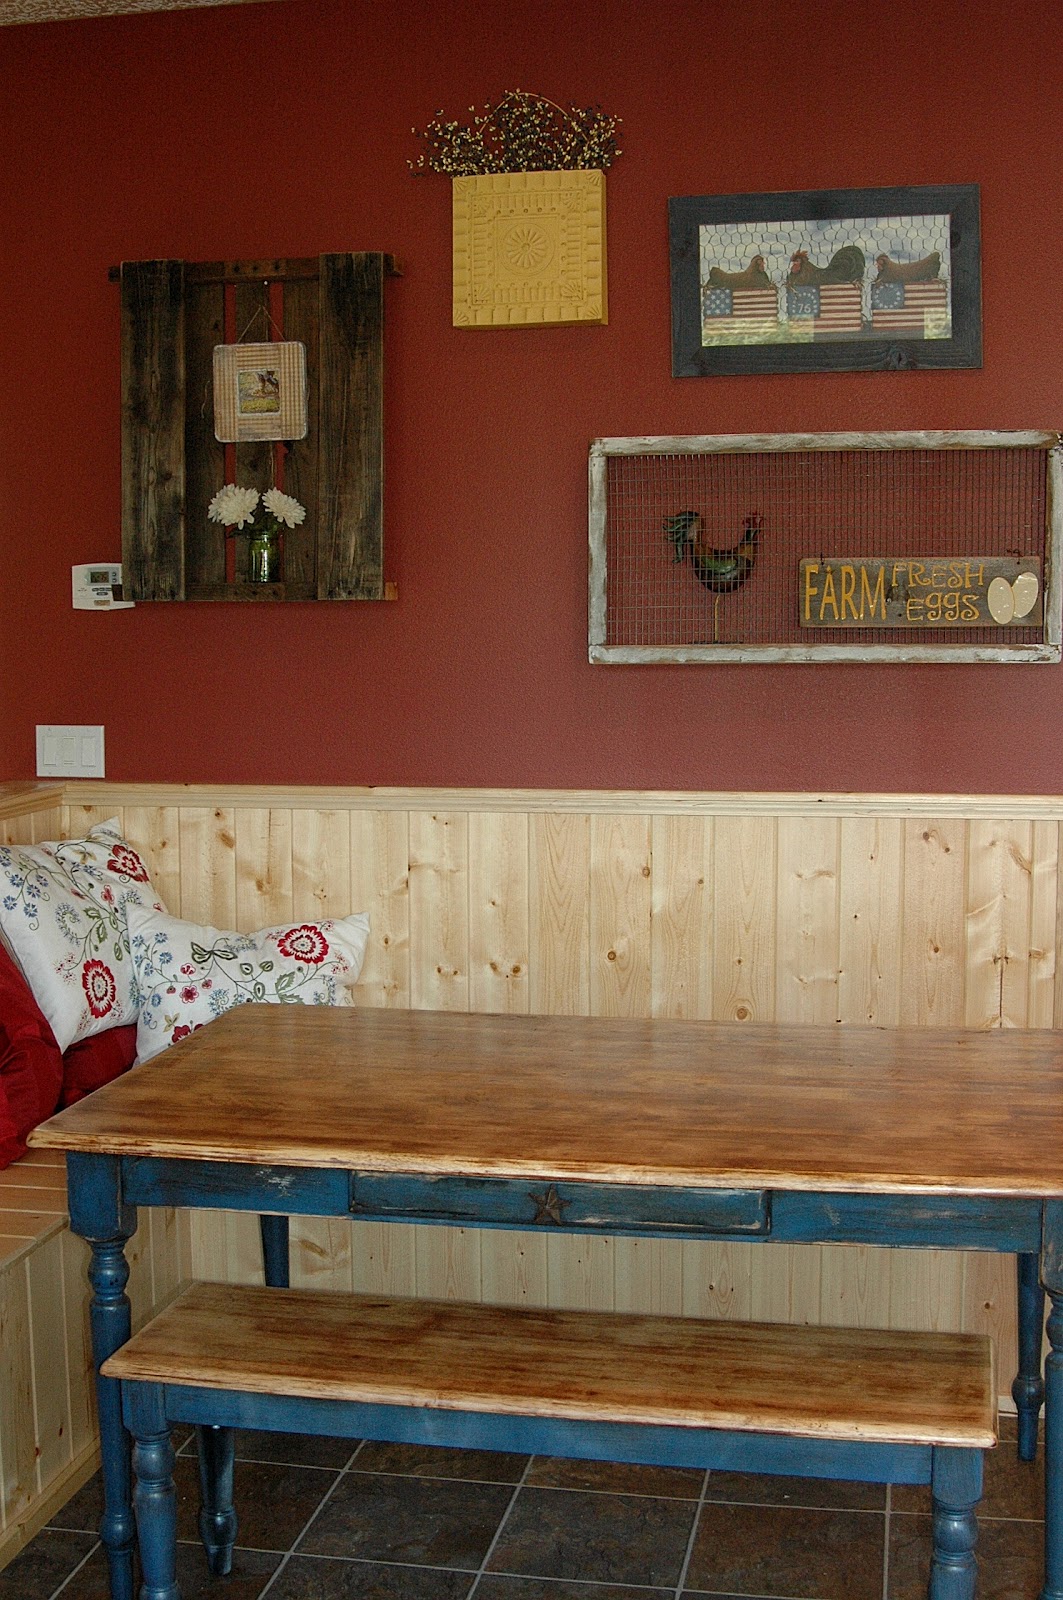
AFTER: Light, natural stained tops and country blue and antiqued stained legs.


Added clear stain to tops of table and bench, then 2-3 coats of clear sealer. After of each layer of sealer you need to use very fine sandpaper to smooth down the surface, then add another layer of sealer and sand again.
Now for the awesome "L" shaped bench!! Wish I could say I knew how to build it, but I don't trust myself to build a bench that will last forever and hold kids (as they jump on it and climb) so we had our builder, who can make anything build it for us!! (I'd give him a link to his website, if he had one!!)


Then to put the room together with my "newly remade" table and bench! After standing in our kitchen to eat most meals for the last 4 years...I love having our table right in our kitchen! Amazing how nice it is to sit, "relax" (not really- with kids I'm always up to get them something or more food!) and eat~


No comments:
Post a Comment